
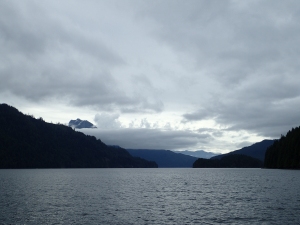
OLYMPUS DIGITAL CAMERA
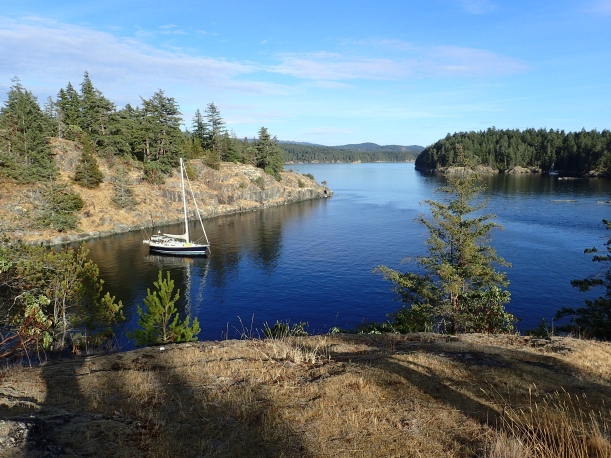
I was looking at my WordPress stats and noticed that there were a number of visitors looking for advice on stern tying. Based on the myriad of techniques we’ve seen – some good and some really bad – this is a great question…how do we stern tie? This might sound flip, but for the most part, we don’t. We much prefer to swing free and avoid tying ashore if we can. We dislike (hate?) tying a line ashore for a few reasons:
- It’s extra, usually unnecessary, work.
- We think it is often less secure than swinging free due to the potential of having wind on the beam.
- Wind or current can make tying back difficult.
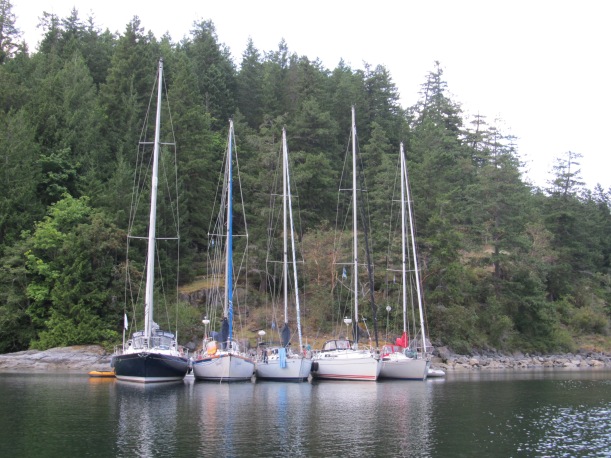
That said, sometimes a line ashore is a necessity. In tight or crowded anchorages a line ashore keeps you from swinging into the shore or your neighbours. In deep anchorages such as Teakerne Arm in Desolation Sound, , a stern line might be the only thing keeping your hook attached to the bottom. And for a great raft-up, tying ashore is the easiest way to minimize the possibility of fouling each other’s anchors when setting multiple hooks.
Over the years, we’ve developed the following system that works well for us and requires only two people :
- Get your stuff ready. You’ll need a way to get ashore and a long floating line ready to go. We use an SUP about half the time, and find a dinghy without a motor is a bit easier to deal with than one with a motor. Our line is 200′ of 1/2″ polypropylene (floating – very important) single braid, flaked into an IKEA bag. Flaking your rope instead of coiling it is a climber’s trick – if you flake the line into the bag, it should come out tangle free, BUT, this only works with braided line. 200′ is a bit on the short side for a stern tie line, but it works most of the time. Being ready means that your dinghy is in the water and your line is in the cockpit ready to deploy tangle free.
- Pick your spot with care. Preferably, you are looking for a spot with fairly deep water right up to the shore, with plenty of room on either side. A good spot will put you in a protected little nook that will shelter you from the worst of any strong winds. The perfect spot will put you in a little nook AND line your boat up with the prevailing winds. Perfect spots are hard to come by, especially in the Gulf Islands where many of the anchorages are lined up with prevailing SE and NW winds, but are too skinny to permit tying ashore with your bow facing in either direction.
- Identify a suitable shore anchor. The best anchor is a purposely placed stern tie ring. Second best is a dead tree or large log that is firmly attached/stuck in it’s current location. Third choice would be a live tree – pulling a line around a live tree can kill it by removing bark around the tree’s circumference so we avoid doing so if at all possible.
- Line your boat up with your stern pointing at your target stern tie anchor and your bow over your desired anchor location. For us, this is the hardest part: judging the distance to the shore isn’t easy, and the fact that the depth decreases as you near the shore complicates scope calculations. Usually, we would prefer a scope of at least 4:1, and in a typical stern tying situation where you are just trying to limit your swinging room, this calculation is easy and identical to a calculation that you’d make if you were swinging free. But in an anchorage where the depth increases rapidly, you might drop your anchor in 70′ and be lying in 20′. The thing to remember in these locations is that it isn’t the scope that is important, it is the angle that the anchor shank makes with the bottom – a lower angle is better. In almost all anchorages, the slope of the bottom works to your advantage when your butt is pointing at the shore, and against you when it’s not. A stern tie in a rapidly shoaling anchorage makes sure that the slope of the bottom is always working to advantage, and in some cases, might be all that keeps the hook engaged. Judging the best place to drop the hook in these more extreme cases can be challenging. Generally we avoid these anchorages, but when pressed, we look for to drop at least 2:1, and back down hard to make sure we are well set before running the line ashore. In the above example (70′ deep at the anchor location with the boat lying in 20′), we’d want to drop the anchor at least 225′ from the shore, and we’d put out at least 150′ of rode.
- Drop your hook. This should be the easiest step.
- Back down on your hook. Set your anchor as you would if you were going to swing free.
- Keep some tension on your rode. Lower the engine RPM to idle, but generally speaking, do not take it out of gear. This step is our secret sauce and makes the rest of the process as painless as possible.
- Take the line ashore. When you get ashore, be sure to secure your ride back to the mother ship – watching your dinghy float off while you are running a line around a tree will be unpleasant at best. If you have 3 aboard, the third crew can help by piloting the dinghy and standing off the shore while you work. This makes the whole process a little bit easier and is a great job for a child. Steps 6, 7 and 8 need to be done as quickly as possible.
- Run your line through or around your shore-side anchor point. If you have any doubt about the quality of your anchor point, give it a good test first.
- Pull enough line to make it back to your vessel. Be generous here as it’s easier to straighten up extra line later than it is to let out extra line so that you can reach the mother ship on your way back. Have the crew fasten their end of the line to a cleat.
- Pull your boat into line with the anchor. On our boat, prop walk moves her slowly to port, and if it takes too long for me to climb ashore and put the line around / through the anchor, she’ll need a little tug to get her back where I want her. This is an important step important as it will minimize the amount of line needed to get back to the boat. It is better to do this step after running the line through or around the anchor point – the extra friction that the shore-side anchor provides means that once you’ve re-positioned your boat, it’s not that hard to keep enough tension on the line to keep her in position. Having the crew take the boat out of gear at this time will help pull the boat into a straight line, but once the boat is lying where you want it, be sure to put the boat back into reverse – it makes the next step easier…
- Throw the line you’ve pulled into your dinghy and get back to the boat. You can row or you can just pull your self back using the line you’ve just run. If I’m using a SUP, I just let the extra line I’ve pulled float and only take the end back with me. Sometimes, you won’t have enough line to reach all the way back to the boat. If this happens and depth allows, move the boat closer to the shore by putting the boat into neutral, letting out more anchor rode, and then putting the boat back into reverse. If you can’t move the boat closer to shore, you’ll have to tie the stern line off to itself. In these cases, we always pull out all of our line so that the knot you’ll have to tie will be as close to the boat as possible. Most of the time, our line is long enough to make to the shore and back.
- Hand the end of the line to your crew and have them cleat it off. The boat can be taken out of gear now and the engine shut down.
- Adjust your lines and set your snubber. In the absence of wind, we like to have our stern line slack enough that it is floating. Sometimes we let out more scope, sometimes we put out more stern line, and sometimes we do nothing. If the wind pipes up, a line with slack is far preferable to a tight line as the system will put less load on your gear.
- Check your work. It’s like a high school test – you’re not done till you check your work, only this time the results really matter.
- You’re done. Go ahead and celebrate.
The meat of this system is that it is methodical – we always do this job the same way. This consistency means that we are efficient. The secret sauce is to keep the engine running and in reverse for most, if not all, of the operation.
Weighing anchor is usually pretty easy. Start the boat, and then let the stern line go. Often there is no wind and we can pull in the line, flaking it into the bag as it’s pulled, and then haul the anchor as per our normal routine. If its blowing on your beam, these jobs will need to be done somewhat simultaneously, but a floating line will buy you a little breathing space as it can be trailed behind you while you weigh anchor without fouling the prop as long as you don’t get crazy with the reverse. Beware of the line getting caught in rocks or a branch ashore as you retrieve it – you might have to jettison the whole length and retrieve it with the dinghy once your have navigated to a safe location.
What not to do…
We’ve seen people try some crazy stuff in an attempt to stern tie. More often though, we just see people working inefficiently or without a plan. Here are a few things that we’ve seen that don’t work.
- Dropping the anchor before you have everything ready to go. Just don’t do this…it’s silly and usually doesn’t end well.
- Tying ashore in a strong cross breeze or current. This is possible if you’re both practiced (fast) and have everything ready before you drop the hook. But, it’s really hard to do, especially in a crowded spot where you might be trying to slot yourself between two boats that are already settled. Our own biggest stern tying dramas have resulted from attempting to do this.
- Using the outboard to pull the mothership into position. This is a regular thing for some people, and with the rope trying to pull them out of the dinghy as they hang on to it for dear life with one hand while controlling the dinghy with the other, it always looks difficult, uncomfortable, and dangerous. Pull on the stern line to put your boat where you want it while your are standing firmly on the ground – it’s easier and safer.
- Tying the line ashore before dropping the hook. I’ve read that this is a real technique and have seen people pull it off. We’ve also seen a couple of disasters, including one that required efforts from multiple boats in the anchorage to get the newcomer settled. Drop your hook first.
- Yelling complex directions at each other. This one usually works, but at what cost? Having and executing a plan will minimize the need to communicate as you complete the steps.
Tips for being the second anchor down in a rafting situation:
- Anchor as you would’ve if you were the first to anchor, but be very careful that you are not dropping your gear on top of your rafting partner’s tackle.
- Put out the scope you think you’ll need and back down on your anchor to set it.
- Once your anchor is set, let out 40 or 50 more feet of rode to give yourself some slack in you system. This will allow you to maneuver into position far easier than if your rode is tight.
- If possible, back up a little too far beside your rafting partner. If you’ve done a good job of positioning yourself, you should be able to drift forward and alongside fairly easily. If you haven’t, power forward and try again.
- Once you’ve got your boat secured with bow, stern and two springs, haul in the extra rode you let out and snub your anchor. Ideally, you want the load shared equally between the two anchors.
If we’re the second both in a raft of two, we don’t usually put out a second stern line – having less gear out makes getting away in a hurry easier. If it’s blowing enough that we’re worried about the stern line, we will sometimes add a second. If it’s blowing enough that this is still not enough, it’s time to move.
I hope these tips make your next (first) stern tying experience the low stress routine experience that in can be. If your experience isn’t routine or low stress, practice will improve your skills and confidence. Fair winds!


 We carry a weather book that tries to explain how our weather works. Although it is well written, the one I have is pretty general, and covers concepts that apply globally. I’ve been looking for one with a local bias, and found


